The most common reason solar lights stop working is that the rechargeable batteries are dead or worn out. Solar lights use batteries to store the energy they collect during the day.
These batteries stop being able to hold a charge after one to two years. Other things that can go wrong are unclean solar panels that block sunlight, bad positioning in shaded locations, or a switch that turns the system on and off in the wrong place. Most of the time, the fixes are to clean, move, or replace cheap batteries.
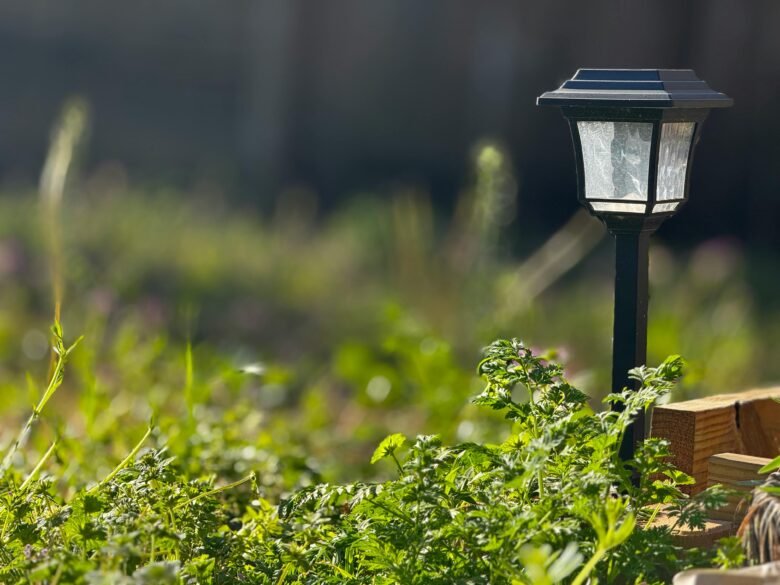
How to Diagnose and Fix Solar Lights?
Before you throw that light in the trash, let’s troubleshoot. We’ll go from the simplest fix to the most complex.
1. The “On/Off” Switch Check
It sounds almost too simple to mention, but this is the number one reason people think their lights are broken.
- The Problem: Many solar lights have a manual switch located under the cap or on the bottom. If this switch is set to “Off,” the light will never turn on, even if the battery is fully charged.
- The Fix: Locate the switch. Ensure it is set to “On”. If there is a setting for “Auto” or “On/Off,” use “Auto” or “On.” After switching it on, cover the solar panel completely with your hand. If the light turns on within 30 seconds, you’ve solved the problem.
2. The Pull Tab (For New Lights)
If you just bought these lights and they aren’t working, look for a small plastic pull tab.
- The Problem: Manufacturers insert plastic strips to prevent the battery from draining while the product sits on a shelf in a dark warehouse.
- The Fix: Remove the pull tab. Once removed, the battery contacts will connect. You may need to leave the light in direct sunlight for a full day to prime the battery before it works at night.
3. The Deep Clean
Solar panels are the “power plant” of your light. If they are dirty, they cannot generate electricity.
- The Problem: Dust, pollen, bird droppings, and water spots create a barrier that blocks UV rays.
- The Fix: Use a soft, damp cloth (microfiber works best) to wipe the solar panel. Do not use chemical cleaners, Windex, or abrasive sponges. These can leave a residue that clouds the plastic or glass, permanently reducing efficiency. If the panel is scratched, the light will struggle permanently.
4. Battery Replacement
If cleaning and switching it on didn’t work, it’s almost certainly the battery.
- The Problem: Most solar lights use Ni-MH (Nickel-Metal Hydride) or Ni-Cd (Nickel-Cadmium) rechargeable batteries. These have a lifespan of about 1 to 2 years. Once they degrade, they cannot hold enough power to last through the night.
- The Fix: Open the battery compartment (usually located under the cap or behind the solar panel). Remove the old batteries and replace them with new rechargeable batteries.
- Crucial Tip: Do not use standard Alkaline batteries (like Duracell or Energizer Coppertop). Alkaline batteries are not designed to be recharged by the solar panel and will leak or rupture, destroying the light. Stick to Ni-MH or Ni-Cd.
5. The “Dark Test” for Sensor Issues
Sometimes the light itself works, but the sensor (photocell) that tells it when to turn on is faulty or blocked.
- The Problem: The sensor thinks it’s still daytime. This can happen if the sensor is dirty or if ambient light from a porch light or street lamp is hitting the panel.
- The Fix: At night, cover the solar panel entirely with a thick piece of tape or a box. If the light turns on, the sensor is fine, but the placement is bad. You need to move the light away from competing light sources (like house lights) that are “tricking” it into staying off.
6. The Water Damage Assessment
Solar lights live outside, but they aren’t all built to withstand monsoons or sprinklers.
- The Problem: Water seeps into the battery compartment or the LED housing. This causes corrosion on the metal contacts, preventing the flow of electricity.
- The Fix: Open the unit and look for white, powdery residue (corrosion) on the metal springs or contacts.
- Use a cotton swab dipped in rubbing alcohol to gently scrub the corrosion away.
- Ensure the rubber gasket (the rubber ring around the lid) is seated properly. If it’s missing, the light will continue to get wet and will eventually fail permanently.
7. The Placement Audit
You can have brand new batteries and a spotless panel, but if the light is in the wrong location, it will never work.
- The Problem: “Solar” lights need direct sunlight. Placing them under a tree, against a north-facing wall, or under the eaves of a house means they get “indirect” light or shade. Shade produces a trickle charge, not a full charge.
- The Fix: Move the lights to a spot that receives 6 to 8 hours of direct sunlight. If your yard is heavily shaded, consider buying a “remote” solar panel kit where the panel can sit in the sun while the light stays in the shade.
Common Mistakes to Avoid
Even when trying to fix the lights, DIY beginners often make mistakes that kill the lights for good. Avoid these:
- Mistake 1: Throwing away “dead” batteries immediately.
- Why: Sometimes batteries just need a “jump start.” If they’ve been sitting in storage or winter darkness, they enter a deep discharge state. Leave the light in direct sunlight for 2–3 consecutive days before assuming the batteries are dead.
- Mistake 2: Mixing old and new batteries.
- Why: If your light takes two batteries, and you replace only one, the old battery will drag down the new one. Replace all batteries in the unit at the same time.
- Mistake 3: Installing lights in autumn shade.
- Why: The sun’s angle changes in winter. A light that worked perfectly in July may suddenly stop working in October because the tree leaves are blocking it, or the sun is too low. Trim branches or move lights seasonally.
- Mistake 4: Forgetting to “Prime” new lights.
- Why: People buy lights, put them in the ground at 5:00 PM, and expect them to shine brightly at 8:00 PM. New batteries arrive with a partial charge. You must let them charge for 24–48 hours in full sun before first use.
- Mistake 5: Using high-pressure water hoses.
- Why: Power washing your patio or driveway near solar lights forces water into the sealed units. Always hand-wipe or gently rinse solar lights.
Pro Tips / Expert Insights
Most articles stop at “replace the battery.” Here is how to actually extend the life of your solar lights for years.
- The Winter Storage Hack: If you live in an area with heavy snow or freezing rain, bring your solar lights inside during the winter. The freeze-thaw cycle cracks the plastic housing and corrodes the circuits. Store them in a cool, dry place. Bring them out in the spring, and they’ll look brand new.
- The “Reconditioning” Trick: If your Ni-MH batteries seem weak, you can sometimes recondition them. Let the light run until it is completely dead (cover the panel for a day to drain it). Then, give it a full 48-hour charge in the sun. This “deep cycle” can break down crystal formation inside the battery, restoring some capacity.
- Upgrade Your Batteries: If your light came with Ni-Cd (Cadmium) batteries, swap them for Ni-MH (Nickel-Metal Hydride) batteries. Ni-MH batteries have a higher capacity (mAh), meaning they hold a charge longer and are less toxic to the environment.
Replace Battery vs. Replace Light
When a solar light fails, you have to make a decision. Here is a cost-benefit analysis to help you decide whether to fix or toss.
| Feature | Replace the Battery | Replace the Entire Light |
|---|---|---|
| Cost | $1–$4 per battery (Low) | $10–$50+ per light (High) |
| Time Required | 5 minutes | 15 minutes (unpacking/placing) |
| Best For | High-quality fixtures (metal, glass) that are 1-3 years old. | Cheap plastic lights that are cracked or waterlogged. |
| Skill Level | Beginner | Beginner |
| Longevity | Adds 1-2 more years of life. | Resets the clock; lasts 2-3 years typically. |
Verdict: If the housing is intact and the solar panel isn’t cloudy, always replace the battery first. It’s cheaper and better for the environment.
Real-Life Scenario: Sarah’s Patio Lights
Sarah had a set of beautiful stainless steel solar path lights lining her driveway. After 18 months, half of them stopped working. Frustrated, she nearly bought a $150 replacement set.
Instead, she brought them into her garage and inspected them. She noticed three of the lights had water condensation inside the lens. The others looked fine.
The Fix: For the wet ones, she disassembled them, dried them with a hair dryer on a cool setting, and applied a thin layer of petroleum jelly to the rubber gasket to create a better seal. For the dry ones, she opened the battery compartment and discovered the original batteries had swelled slightly. She replaced all the batteries with high-capacity Ni-MH 1000mAh batteries.
The result? All six lights lit up brighter than the day she bought them. Total cost: $18 for a pack of rechargeable batteries. Total time: 30 minutes.
FAQs
Can you leave solar lights out in the rain?
Yes, most solar lights are designed to be weather-resistant (IP44 or IP65 rating). However, they are resistant, not waterproof. Standing water or heavy driving rain can still seep into the battery compartment if the seals are worn out.
Why do my solar lights come on during the day?
This is usually due to the “twilight sensor” being covered or dirty. If the solar panel cannot detect light because it is covered in dust or shadow, it thinks it’s nighttime and turns the light on.
How long do solar light batteries last?
Rechargeable Ni-MH batteries typically last between 1 and 3 years, depending on the quality of the battery and the climate. Extreme heat shortens battery life faster than cold temperatures.
Do solar lights need direct sunlight or just daylight?
They need direct sunlight. While they will charge slightly on cloudy days, they require UV rays hitting the panel to generate enough voltage to fully charge the battery. A shady spot will result in dim lights that last only 1–2 hours.
Why are my solar lights getting dimmer?
Dimming is a classic sign of battery degradation. As batteries age, their internal resistance increases, meaning they can’t release the stored energy as quickly. A battery replacement usually restores full brightness.
Can I use regular AAA batteries in solar lights?
No. Never use regular alkaline batteries. They are not rechargeable. If placed in a solar light, the solar panel will attempt to charge them, causing them to overheat, leak acid, and potentially ruin the light unit or start a fire.
Conclusion
Few things are as disappointing as a dark yard when you’ve invested in solar lighting. But as you’ve learned, solar lights not working is rarely a death sentence for the unit. In most cases, the problem is a simple fix involving a $2 battery swap, a quick cleaning of the panel, or moving the light into a sunnier spot.
Before you head to the big box store to buy replacements, grab a screwdriver, some microfiber cloths, and a pack of rechargeable Ni-MH batteries.