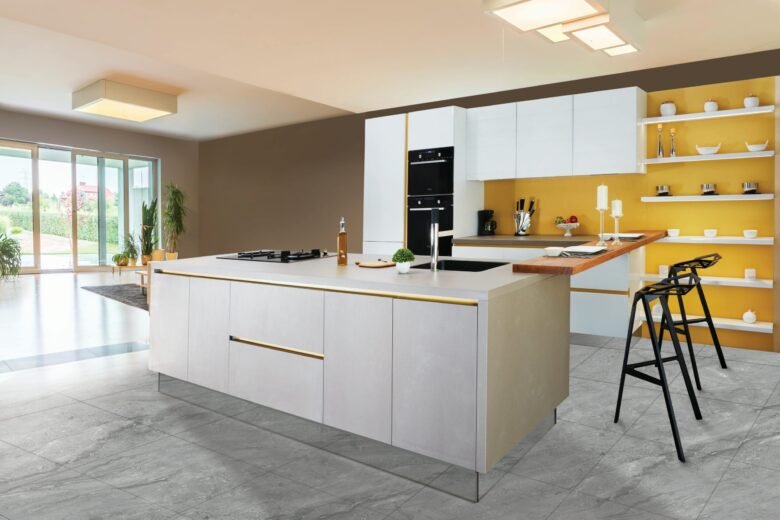
Kitchen cabinets play a big role in how your space looks. If they seem worn or outdated, the whole kitchen can feel off. You don’t have to do a full remodel to make a big difference.
While many people spend $12,000 to $35,000 on kitchen renovations, the three upgrades below can make a big impact for much less, often under $500 in total.
The trick is to focus on changes that give you the most visual impact for your money. Painting cabinets, updating hardware, and adding lighting fit the bill. Here’s how to tackle each one.
Upgrade 1: Repaint Your Cabinets
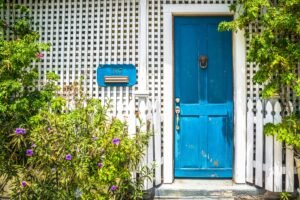
Changing your cabinet color is the quickest way to give your kitchen a new feel. It takes the most effort of these three upgrades, but the results are worth it in terms of looks and value.
Cabinet refinishing typically runs between $50 and $200 in materials, compared to thousands for replacement.
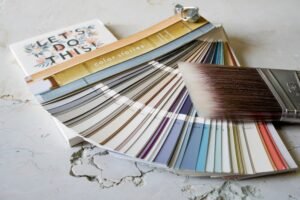
Choosing the Right Color
Choosing the right color is more important than you might think. Your cabinet color should go well with your floors, countertops, and tile, not just look nice on a paint sample.
Right now, muted colours like navy blue, olive green, forest green, and warm charcoal grey are popular. Classic white is still a safe and timeless pick, especially for smaller kitchens that need more light.
A two-tone look, with darker cabinets on the bottom and lighter ones on top, is a popular choice in modern kitchens. It helps anchor the space without making it feel too dark. If you’re not ready for bold colors everywhere, this is an easy way to try something new.
What Paint to Use?
When painting kitchen cabinets, the finish is just as important as the color. Semi-gloss and satin finishes are good choices because they’re durable, easy to clean, and look polished.
High gloss paint is another option, but it shows every flaw and is usually best for professionals. For wood cabinets, use an oil-based primer before painting to prevent stains from showing through and help the paint stick.
Step-by-Step Process
- Remove all cabinet doors and hardware. Store screws in labeled bags.
- Clean all surfaces well with a degreaser. Grease in the kitchen can stop paint from sticking properly.
- Sand the surfaces with medium-grit sandpaper to rough them up, then wipe off any dust.
- Apply an oil-based primer and let it dry fully, usually 24 hours.
- Use a foam roller to paint for a smooth finish without brush marks.
- Apply a second coat. Let it cure before rehanging doors.
- Apply two coats of clear polyurethane to help protect the surface from everyday wear and tear.
A report from Bob Vila notes that the total cost to refinish kitchen cabinets, including materials like paint and protective finishes, typically ranges from $4 to $25 per square foot.
Upgrade 2: Swap the Hardware
If painting seems like too much work, changing the hardware is the quickest way to update your cabinets without painting.
You can finish this project in just a few hours, and it’s easy to undo, so it’s great for renters as well.
Why Hardware Has Such a Big Impact?
Knobs and pulls are like the finishing touches in a kitchen. Even though they’re small, people notice them, especially on plain cabinet doors.
Replacing old brass or plastic hardware with something modern, like brushed gold, matte black, satin nickel, or aged bronze, shows you’ve made a thoughtful design choice. It helps older cabinets look fresh instead of worn out.
How to Choose the Right Hardware?
Before buying anything, measure the distance between existing screw holes on your drawer pulls. Standard spacing is 3 inches or 3.75 inches centre-to-centre, but this varies.
Pick hardware that fits your current screw holes to avoid extra work like patching or repainting.
When choosing a style, consider the look you want for your kitchen:
- Matte black reads modern, minimalist, and industrial.
- Brushed gold or brass leans warm, contemporary, or even slightly vintage, depending on the cabinet colour.
- Satin nickel or chrome finishes are clean and neutral, and they pair well with stainless steel appliances.
- Wood or ceramic adds texture and works well in farmhouse or cottage-style kitchens.
Another idea is to mix different knob shapes and finishes, as long as they’re in the same metal family. For example, using two types of gold-toned pulls on different cabinets can add interest without looking mismatched if you plan it.
If you’re on a budget, check out thrift stores or architectural salvage shops. They often have good hardware for much less than retail stores.
Installation Notes
Pulls require two holes, while knobs require only one. If you’re changing from knobs to pulls, or vice versa, you’ll have to patch the old holes or find hardware that fits the new setup.
The screws that come with new hardware can be too short for thick cabinet doors. To be sure, buy longer screws at the hardware store if you need them.
Upgrade 3: Add Under-Cabinet Lighting
Many people haven’t added under-cabinet lighting yet, but it’s often the upgrade that surprises them the most. It does two things at once:
It makes your kitchen more useful by illuminating your counters and adds a warm, welcoming feel to the whole room.
LED Strip Lights vs. Puck Lights
LED strip lights are very popular right now because they’re slim, affordable, and easy to install with sticky backing. They spread light evenly across your counters and usually cost $20–$40 for a six-foot strip.
Puck lights are another simple option. They’re round, self-contained, and easy to put in, but they create spots of light instead of a smooth glow, which can look uneven on longer stretches.
For a more high-end touch, try motion-activated LED strips that turn on when you approach the counter. They cost a bit more but are very handy at night.
Placement and Color Temperature
Where you put the light strips matters: mount them near the front edge of the upper cabinets, rather than right against the wall.
This setup shines light onto your work area, helping prevent harsh shadows. If you put the lights too far back, most of the light will hit the backsplash, leaving your cutting board in the dark.
For the best colour, choose lights in the 2700K–3000K range (warm white). This gives a cosy, soft glow that looks good on food, surfaces, and people.
Cooler lights (4000K and above) can make the kitchen feel more like a lab, but they do help you see better for detailed work.
Going Further With Lighting
If you have open shelves or glass-front cabinets, think about adding small LED strips inside. Lighting up display shelves adds depth and draws attention to your favourite dishes or decorations, making the kitchen look more put-together.
Doing All Three Together
Each of these upgrades makes a difference on its own, but they work even better together. Fresh paint changes the overall look, and new hardware draws the eye and shows you’ve put thought into the design.
Lighting ties the surface together and adds dimension. Done together, the result looks like a kitchen that was professionally redesigned, even when every hour of labour was your own.
A rough budget breakdown for a typical kitchen:
| Upgrade | Low End | High End |
|---|---|---|
| Cabinet repainting | $50 | $200 |
| Hardware replacement | $60 | $300 |
| Under-cabinet lighting | $20 | $100 |
| Total | $130 | $600 |
You can make a big change in your kitchen with just a few days of work.
Before You Start: A Few Practical Notes
Plan before making any purchases. Look at your kitchen and see which cabinets are most visible, like those near the sink, stove, or entryway.
If you are updating in stages, start with those. Doing it yourself can save money, but preparation is key. Most DIY cabinet paint jobs look unprofessional because people skip cleaning and priming.
According to Ken Davies, upgrading your kitchen cabinets can boost your property value by 3.63 percent.
Look for sales on hardware, since prices can change a lot. If you are not in a rush, wait for discounts at home improvement stores or check online for surplus hardware to save money.
Frequently Asked Questions
Can I paint cabinets without removing the doors?
Technically, yes, you can paint cabinets without taking the doors off, but you will usually get better results if you remove them. Painting flat surfaces helps prevent drips, makes it easier to reach the edges, and speeds up the process.
Do I need an electrician to install under-cabinet lighting?
You don’t need an electrician for plug-in or stick-on LED strip lights. These are easy to install yourself. But if you want hardwired lighting that connects to your home’s electrical system, you’ll usually need a licensed electrician, depending on your local codes.
What’s the best order to tackle these upgrades?
Start by painting, then add the hardware, and finish with the lighting. This way, you avoid getting paint on your new hardware, and your lighting goes in after the cabinets are finished.
Will these upgrades increase my home’s resale value?
A modern kitchen is one of the top things buyers look for, and updating your cabinets is one of the best ways to get a good return on your investment. On average, kitchen updates bring about a 30% return, and simple, low-cost changes often pay off more than big, expensive renovations.