Many homeowners think updating a bathroom means spending thousands. While a professional remodel in the US often costs over $10,000, you can make a big difference with a few smart, focused changes for much less.
Begin with a plan instead of jumping straight into demolition
A common budget mistake is removing things that could stay. Before you buy anything, look around your bathroom and decide what needs to be replaced and what can just be updated.
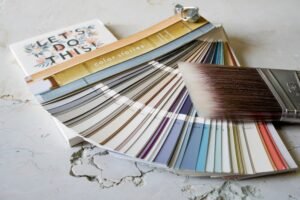
Even a simple mood board lets you see how colours, materials, and textures work together before you spend any money.
Pick your paint colors, cabinet finishes, and hardware together to avoid mistakes like painting a vanity green only to find the countertop does not match.
According to USA Cabinet Store, making quick spending decisions is a big reason remodeling budgets get out of hand.
Try to keep your bathroom’s structure the same and just update its appearance. Plumbing, tile layout, vanity frames, and mirrors can usually stay.
Often, it is the paint, hardware, countertops, and fixtures that make a bathroom look old, and these are easy and affordable to replace.
The DIY Countertop: $9–$30 for a Custom Wood Top
You can buy a single board at a home improvement store for $9 to $30, depending on the size and type of wood, and create a countertop that looks custom-made.
Keep the vanity frame as it is. You do not need to remove the cabinet below. Just place the new wood piece on top of the old countertop and secure it with construction adhesive. This way, you avoid extra plumbing or wall work.
Let the factory-cut edge show at the front, since it’s straighter than a hand-cut edge. Position the board so the cleanest edge faces forward.
Before cutting across the grain, put painter’s tape along your cut line. This helps prevent the wood from chipping or splintering.
Attach a narrow trim strip to the front of a ¾-inch board to make the countertop look thicker and more solid.
Stain the board before installing it, but wait to seal it until after everything fits. Stain in your garage or workspace, check the fit several times, and cut out the sink hole. Apply the final clear coat only after all fittings are done and the sink is in place. This keeps the finish looking good during installation.
Apply at least three coats of polyurethane for the clear finish, sanding lightly with 320-grit sandpaper between coats. For a smooth finish, wet-sand the last coat with 400-grit, then add a layer of wipe-on poly. This thorough sealing is important for bathroom countertops that get wet.
According to Woodworking Advisor, whitewashing wood is a popular technique where you mix white paint or stain with water to give pine a light, rustic look.
After applying the whitewash and wiping it off quickly, following up with a Puritan Pine stain can add warm colour depth and help balance the yellow tones common in raw pine.
For best results and to avoid blotchy absorption, a pre-stain conditioner should be used first.
Painting the Vanity Cabinet: Under $20
If you use the right painting method, you can update an old vanity for under $20. Preparation is crucial. Skipping steps is the main reason painted cabinets start peeling after a year.
Use a degreaser to remove all grime, soap residue, and moisture before sanding the surface.
Sand the surface well. MDF or laminate cabinet doors, which are common in many bathrooms, need a good sanding so the primer sticks. A pad sander is helpful for curved edges.
Choose a bonding primer instead of a standard one, since a regular primer does not stick well to laminate or MDF. A shellac-based bonding primer, like BIN, costs a bit more but helps prevent peeling.
A foam roller produces a nearly smooth finish without brush marks. If you have access to a pneumatic sprayer, the result is even smoother. A quart of cabinet paint from a hardware store, which is enough for a single bathroom vanity, typically costs between $27 and $46, according to The Home Depot.
Do not skip the toe kick. It is easy to forget the small strip at the base of the cabinet. Paint it along with everything else for a finished result.
DIY Board and Batten Trim: ~$18 for a Whole Wall
Board-and-batten trim is a budget-friendly way to make a plain bathroom wall more interesting. Instead of buying expensive pre-cut trim, get a sheet of MDF board for $18 or less, cut it into 3½-inch strips with a table saw, and make your own trim pieces.
According to Gold Team Home, you can often trim a 12-by-12 room for under $300 in materials if you already have the necessary tools, making this technique a cost-effective alternative to purchasing individual trim boards.
Before you begin cutting, sketch the layout on the wall in pencil. Seeing it drawn out lets you adjust spacing and piece count before committing.
Sand all edges smooth, since MDF can splinter and fray if left unfinished.
After installing the trim, caulk every seam and the top edge of the horizontal rail. This fills small gaps and gives the wall a seamless, built-in appearance.
Finish by applying two coats of paint. A quart of cabinet or trim paint from the hardware store, costing $16 to $20, is enough for all the trim in a bathroom.
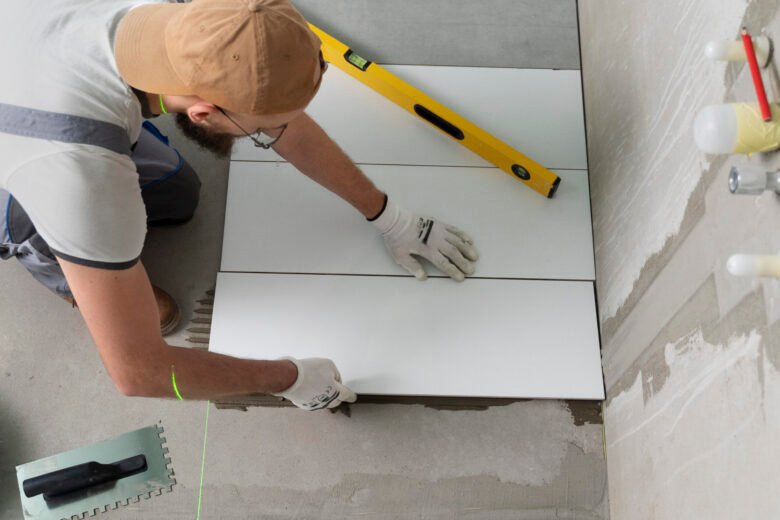
Flooring: $45 for Peel-and-Stick or Click-Lock Planks
You don’t need to spend much to replace the floor in a small bathroom. Peel-and-stick vinyl tiles or click-lock luxury vinyl planks can cover a small space for $45 to $80 in materials.
Instead of measuring each piece, try the board-flip method to cut planks to length. Flip the board backwards so the tongue faces the same way as the last board, slide it to the wall, and mark where it meets the end of the previous board.
This method helps avoid measurement errors and speeds up the job.
According to This Old House, adding a thin line of adhesive to the back of each peel-and-stick tile can boost long-term adhesion, especially in humid environments. Be sure to avoid getting glue near the edges, as it can squeeze out and make installation messy.
Don’t use MDF baseboards, as they absorb moisture and can swell. If you have damaged MDF baseboards, replace them with wood or PVC options.
Brick Paneling and German Smear: $30–$35 per Panel
Decorative brick panels are thin, lightweight, and look like real brick. You can find them at home improvement stores for about $30 to $35 each. They go up quickly with pin nails and only take a few hours to install.
For a whitewashed, textured look (often called German smear), apply lightweight spackling compound over the brick with a putty knife. Cover the dark grout lines first, then go back over portions of the brick faces, leaving some of the texture visible.
According to Red Devil, ONETIME Lightweight Spackling is designed to quickly fill cracks, dents, and small holes in walls and ceilings in just one application. You can keep the brick exposed for an industrial style, or whitewash it for a softer, more cottage-inspired look.
Painting the Shower Tile: $36
If your shower tile is still solid but the colour or grout looks worn, you can use a tub-and-tile refinishing kit for about $36 to give it a fresh look. Done right, it really does look like new tile.
The prep work is critical and non-negotiable:
- Clean the entire shower with bleach and water using a wire-bristle sponge.
- Sand with 320-grit sandpaper to create a surface the paint can grip.
- Wash again, sand again, wash, and dry completely.
- Apply the solution that comes with the kit, following the directions precisely.
The fumes from this process are strong. Close off the bathroom, open windows, and use a fan to blow air outside. Sleep in another room while it cures, and block gaps around the door with towels. The smell can linger in your home for up to 24 hours, so always wear a respirator.
Once cured, the surface stands up well to regular shower use. For a finishing touch, spray-paint metal fixtures like faucet handles, shower arms, or door edges with exterior-grade black spray paint. This adds a fresh look for just a few extra dollars.
DIY Mirror Frame: $20–$40
A decorative mirror frame can cost $200 to $400 if you buy one, but you can make your own with a corner trim piece and decorative moulding from the hardware store for less than $40 in materials.
To build the frame, use an L-shaped corner trim as the base that covers the mirror edge, then add a decorative moulding on top for style. Cut all four corners at 45 degrees. Use super glue for the corners and a small staple gun to hold everything together while it dries.
Practical tips:
- Cut test pieces from scrap wood before making your real frame cuts. Mitre joints can be tricky, so it’s best to practice first.
- Paint or spray the frame before attaching it to the mirror.
- To create an antique look, brush on diluted brown or black acrylic paint, then wipe it off. The paint left in the crevices gives an aged effect. Use more water than you think you’ll need, since it’s easy to make it too dark.
Hardware and Small Fixtures: $5–$50
Hardware is like jewellery for your bathroom, but it’s often overlooked. Swapping out drawer pulls and cabinet knobs for wood, ceramic, or matte black options is inexpensive and can quickly change the room’s look.
Adding Dollar Tree drawer liners to your cabinet drawers is a simple, satisfying finishing touch. They cost just $1 each and can be cut to fit.
Lighting: An outdated light fixture can make even a freshly painted bathroom feel dated. According to Tom’s Guide, Home Depot’s early spring sale offers major discounts on a variety of home improvement items, including lighting fixtures, with savings of up to 50%. When installing new vanity lights, make sure the fixture is centred over the vanity itself rather than aligned with the nearest stud from a previous installation.
Hang your shower curtain rod as close to the ceiling as possible, rather than at the usual height. The extra fabric length makes a small bathroom feel much taller. If the curtain is too long, hem it so it doesn’t touch the floor.
Budget Tracking: A Sample $500 Breakdown
| Item | Approximate Cost |
|---|---|
| Wood countertop board | $9–$30 |
| Vessel sink + faucet | $80–$120 |
| Brick panel (1–2) | $30–$70 |
| Spackling (German smear) | $8–$12 |
| MDF sheet (board & batten) | $18 |
| Peel-and-stick or LVP flooring | $45–$80 |
| Vanity paint (quart) | $16–$20 |
| Tub & tile refinishing kit | $36 |
| Mirror frame materials | $20–$40 |
| Spray paint (fixtures/hardware) | $8–$15 |
| Drawer knobs | $5–$15 |
| Lighting | $35–$60 |
| Total | ~$310–$516 |
You can keep your costs under $500 by reusing hardware, skipping countertop replacement, using scrap wood, and buying lights from discount stores.
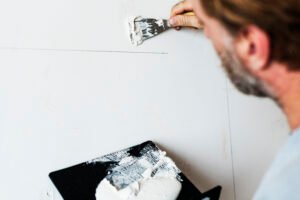
Drywall Repair: The Important Step You Shouldn’t Skip
When you take down fixtures, mirrors, or hardware, you’ll usually find anchor holes, torn drywall paper, and rough spots. If you paint over these without fixing them, you’ll see shadows and bumps, especially under bright bathroom lights.
Here’s what to do for small holes and seams:
- Use a 5-minute or 20-minute setting compound. Avoid pre-mixed all-purpose compound because it takes longer to dry and is harder to sand smooth.
- Put drywall mesh tape over all seams before you add the compound. This helps prevent cracks later on.
- It’s better to use several thin coats instead of one thick coat. Thick coats are more likely to crack or shrink.
- Sand between coats using a fine-grit sponge or sandpaper. Use an electric sander only if you have full respiratory protection, since the dust is fine and can get everywhere.
- Always prime the repaired spots before you paint. If you skip primer on bare compound, the paint will soak in unevenly, leaving dull areas called “flashing.”
The 20-minute compound gives you more time to work than the 5-minute kind, so it’s easier to smooth out the edges and avoid lap marks. If you’re new to this, the extra time is helpful.
What Should You Keep and What Should You Replace?
| Keep (Repurpose) | Replace or Refresh |
|---|---|
| Vanity cabinet structure | Countertop surface |
| Existing mirror glass | Mirror frame |
| Tile (shower or floor) | Paint or resurface tile |
| Vanity plumbing rough-in | Faucet and fixtures |
| Hinged medicine cabinet mirrors | — |
| Solid wood doors | — |
Most of your budget savings come from choosing what to keep and what to replace. You can find a vessel sink and faucet for about $80 to $120 on Amazon, and they look pricier than they are. Add a $30 wood countertop and a freshly painted vanity, and you’ll see a big change in your sink area.
Wrapping Up
Remodelling your bathroom for under $500 isn’t about doing less; it’s about making smart choices. The best value usually comes from simple updates like paint, new hardware, a countertop, better lighting, or fresh trim. Big changes, such as moving plumbing or replacing tile, can quickly push costs into the thousands.