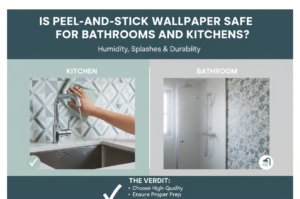
Peel-and-stick wallpaper can work on lightly textured walls but usually fails on heavy textures. If your wall has an orange-peel or light knockdown finish, many thicker removable vinyls will adhere well with the right prep.
Coarse knockdown, sand finishes, and popcorn-style textures reduce contact area and tend to cause seam lift, bubbling, and short lifespans unless the substrate is leveled first.
This information is aimed at renters, DIYers, and small-scale renovators deciding whether to apply removable wallpaper to textured drywall. It explains why adhesion succeeds or fails in plain terms, outlines decision factors, lists tools and safety steps, presents a realistic example, and provides cost and timing estimates so you can pick the right path.
Why Texture Matters: The Physics in Plain Language
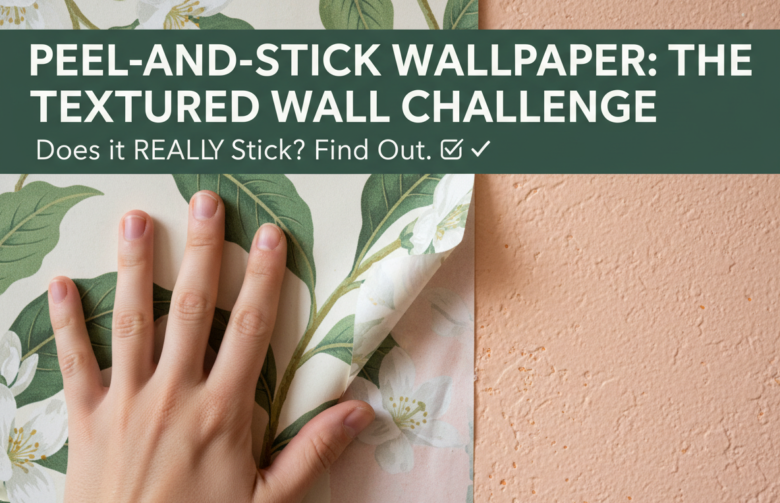
Peel-and-stick products use pressure-sensitive adhesive (PSA) that needs surface contact to stick. On a smooth wall, the adhesive wets the surface and creates continuous contact.
On textured walls, the adhesive touches only high points, leaving gaps where air and dust can collect; those gaps concentrate stress on peaks and cause seams or corners to lift.
Thicker, more conformable adhesive and a heavier backing increase contact area and distribute pressure across bumps, improving the odds of mild texture.
Which Textures Usually Work and Which Don’t?
Orange peel (fine dimple)
- Light knockdown: Often workable with careful prep (clean, light sanding or primer) and a thicker vinyl backing; seams need attention.
- Coarse knockdown/sand Marginal. Adhesion is spotty; seams and corners are likely trouble points. Consider skim-coat or lining paper first.
- Popcorn / heavy stipple. Not recommended. Contact area is minimal; wallpaper will likely sag or peel quickly unless the texture is removed.
How Adhesive Chemistry and Backing Construction Change the Result?
Two practical product attributes affect success: adhesive tack and backing conformability. A PSA that is softer and more flowable will wet micro-roughness better. A thicker backing—vinyl laminated to a cloth or foam presses across peaks and hides texture under the print.
Ultra-thin films cling only where flat and reveal every bump, so they are best reserved for smooth drywall. Look for products explicitly marked for textured walls or described as heavy-duty removable vinyl.
Tools, Materials, and Safety Precautions
Tools: utility knife with fresh blades,6- to 12-inch felt-edge squeegee, plastic putty knife or smoothing tool, seam roller, tape measure, long level or plumb line, pencil, microfiber cloths.
- Materials: chosen peel-and-stick wallpaper (thicker vinyl recommended), adhesion promoter or primer for low-suction surfaces (optional), acrylic seam sealer, double-sided temporary mounting tape for stubborn seams,120- to 220-grit sandpaper, cleaning solution (TSP substitute), painter’s tape.
- Safety: ventilate the room when using primers or seam sealers. Wear a dust mask when sanding texture and nitrile gloves when handling adhesives. Keep a flashlight or bright lamp handy to inspect seams and small gaps under various lighting angles.
Step-by-Step Preparation and Installation for Textured Walls
The difference between a short-lived installation and a durable one is preparation. Follow these prioritized steps to reduce failure risk.
Inspect and Prepare
- Check for loose texture: flaking paint, or wallpaper paste residue. Scrape off anything that isn’t well-bonded; wallpaper will lift where the substrate is unstable.
- Clean the wall with a mild detergent or TSP substitute to remove oils, dust, and silicone residues that reduce tack. Rinse and allow 24 hours to dry if possible.
- Repair major gouges: holes, or peeling drywall compound. Patch, let cure, and sand smooth. Small texture can remain, but discontinuities show at seams.
- Lightly sand sharp peaks with 120- to 150-grit sandpaper to remove high spikes that concentrate stress; do not flatten the texture completely unless you plan a full skim-coat.
Do a Small Adhesion Test
Cut a 12 x 12-inch sample from the wallpaper and apply it to a less-visible area following the product’s instructions. Smooth firmly and leave for 48-72 hours. Monitor edge lift, bubbling, and whether removal tears underlying paint. That small test predicts long-term performance far better than spec sheets.
Optional Adhesion Promoter or Primer
If the sample shows partial lifting, consider a primer or adhesion promoter designed for low-suction or chalky surfaces. Some primers create a tack-enhancing film; others smooth microscopically while leaving paint color intact.
Follow manufacturer cure times—typically 24-48 hours—before applying wallpaper.
Measure, Cut, and Hang
- Work in controlled temperatures: adhesives perform best at 60-75°F and out of direct sun or drafts.
- Measure and plan pattern matching carefully: textured walls tolerate less forgiving seams. Allow extra material for trimming.
- Peel back 6-12 inches of liner: align at the top, press the top edge, and slowly remove the liner while smoothing with the squeegee. Press in overlapping passes instead of long single passes to manage small bumps.
- Use a seam roller along joins and press edges with seam sealer if they lift. For deeply textured seams, small strips of double-sided temporary tape behind the join add hold without permanent residue.
- Trim with a sharp blade after smoothing. Replace blades frequently to avoid tearing or uneven cuts.
Troubleshooting, Removal, and Long-Term Performance
Field tests and installer reports show predictable failure modes and timelines.
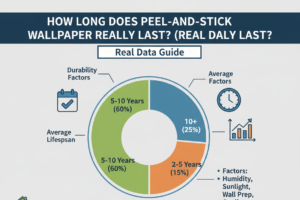
- Short-term (weeks to a few months): Orange peel and light knockdown usually remain adhered if preparation was adequate. Patterned wallpapers conceal minor irregularities.
- Medium-term (3-12 months): Edges and seams are the first failure points on marginal surfaces. Sunlight and HVAC-driven temperature swings speed edge lift. Regular seam rolling and seam sealer prolong life.
- Long-term (12+ months): Lifespan becomes unpredictable on textured walls. For installations expected to last multiple years, smoothing the wall (skim-coat) first or applying a lining substrate is the more reliable route.
Removal Techniques and Using Heat
Removal from textured walls carries extra risk because adhesive can creep into crevices and pull paint. Heat softens the adhesive and helps remove sheets without tearing the paint. Use a hairdryer or heat gun on a low setting, warm evenly, and peel slowly at a low angle.
Test a small corner before proceeding across a whole wall. Keep the heat source moving; overheating will soften paint or paper and can damage drywall.
Common Installation Errors and How to Avoid Them
Skipping a 12 x 12-inch sample test. Many full-wall problems show up only after installation; the small test avoids costly mistakes.
- Choosing thin, smooth-backed products because they look cheaper; these fail on textured substrates.
- Leaving loose texture in place. Wallpaper lifts where flakes or poorly bonded texture remain.
- Ignoring edge treatment. Without seam rolling and seam sealer, seams are likely failure points—even on mostly suitable textures.
Acceptable Texture Tolerances, Costs, and Time Estimate
Use these practical numbers when planning a bedroom, small living room, or accent wall project.
- Texture tolerances: Peaks under 1/16-1/8 inch (about 1.5-3 mm) are generally workable with thicker vinyl; anything larger usually requires leveling.
- Wallpaper cost: Expect $30-120 per 20.5-inch x 16- to 20-foot roll. Products marketed for textured walls sit near the higher end.
- Supplies cost: $25-80 for squeegee, seam roller, utility knife, primer/sealer if you need tools; $15-40 for an adhesion promoter or primer.
- Labor and time: Prep 2-6 hours (cleaning, light sanding, repairs) for a standard bedroom wall. Installation 4-8 hours for one person; two people speed alignment and seams. Allow 48-72 hours for the adhesive to fully set before heavy handling.
Realistic Scenario: Accent Wall in a 10 x 12-Foot Bedroom
A 10 x 12-foot bedroom with an orange-peel textured accent wall and matte latex paint in good condition. The homeowner chose a 20-inch-wide removable vinyl with a fabric-textured backing marketed for textured walls.
They tested a 12 x 12-inch patch in an inconspicuous corner, left it for 72 hours, and found no lift. They cleaned the wall, sanded a few sharp peaks, and applied a low-VOC primer in one glossy corner to increase adhesion. One person measured, cut, and installed the panels; a second person assisted with seams for the first hour. Total active time was about 4 hours for the accent wall, plus 24 hours of adhesive cure before light use.
Two rolls at roughly $75 each plus $40 in supplies. At the 6-month check, the seams remained flat, and the pattern hid the residual texture. This scenario shows how a small test and modest prep can prevent a full-wall failure while keeping costs reasonable.
When Smoothing the Wall First Is the Better Choice?
Choose leveling if the texture exceeds 1/8 inch, if paint is flaking, or if you need a long-term, seamless look. Skim-coating with joint compound or installing lining paper creates a consistent substrate that improves adhesive contact and seam invisibility.
Expect DIY material costs of $100-300 and a few days for drying; professional skim-coating runs $300-1,200+ depending on room size and complexity.
Practical Observations That Matter on Installation Day
Work in subdued, angled light when inspecting seams; small gaps are much easier to see from a low oblique angle than head-on.
- Adhesives feel tackier in cooler rooms: warming the wallpaper slightly with body heat before application helps it conform to the texture during smoothing.
- Cutting against the trim or baseboard is less forgiving on textured walls—plan for 1-2 extra minutes per cut to score and peel cleanly rather than rush and tear the material.
Final Practical Takeaways
Peel-and-stick wallpaper is a workable, renter-friendly option on lightly textured walls when you select a thicker vinyl, do a 12 x 12-inch sample test, clean and remove loose texture, and treat seams with a roller and sealer.
Expect to spend a weekend for prep and installation for an accent wall and budget $30-120 per roll plus $25-80 in tools if you need them. For textures over 1/8 inch, for flaking paint, or for installations intended to last years, plan to level the wall first with a skim-coat or lining paper.