You fell in love with that trendy, renters-friendly peel-and-stick wallpaper. It promised to be temporary. It promised to be easy. But now, as move-out day looms, that cute geometric pattern suddenly looks like a financial liability waiting to happen.
If you are staring at a wall wondering if pulling that paper will take the paint—and your security deposit—with it, take a deep breath. I have been there.
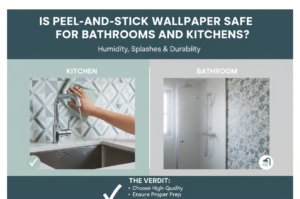
The fear of damaging walls is the number one reason renters avoid wallpaper altogether, but the truth is, removing peel-and-stick wallpaper without damaging walls is entirely possible. You just need the right technique and a little patience.
How to Remove Peel-and-Stick Wallpaper Safely?
To remove peel-and-stick wallpaper without damaging walls, start by heating a section with a hair dryer or heat gun on low to soften the adhesive. Gently lift a corner and pull slowly at a 180-degree angle (flat against the wall), not outward.
If residue remains, spray with a solution of warm water and fabric softener or white vinegar, let it soak, then wipe clean. Never pull dry wallpaper or use metal scrapers.
The Main Guide: A Step-by-Step Approach
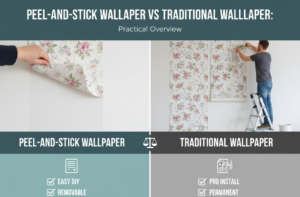
Removing peel-and-stick isn’t like removing traditional wallpaper. Traditional wallpaper requires soaking and scraping; peel-and-stick is meant to be “dry removable.” However, the quality of the adhesive and the time it has been on the wall drastically affect how easy this is.
Phase 1: Assessment and Preparation
Before you start pulling, you need to assess your risk. The biggest variable is the wall paint.
- Eggshell or Satin Paint: These have a slight sheen and are generally more durable. You have a high success rate.
- Flat or Matte Paint: This is the danger zone. Flat paint has no protective layer. Adhesive bonds to the paint itself, and pulling the paper often pulls the paint off the drywall paper underneath.
Tools You Will Need:
- Hair dryer or heat gun (heat gun on low setting only).
- Plastic putty knife or a plastic razor blade (metal will gouge the wall).
- Spray bottle.
- White vinegar or fabric softener (Dollar Store brands work best for residue).
- Microfiber cloths.
- Scoring tool (optional, only for stubborn areas).
Phase 2: The Heat Method (Best for Intact Walls)
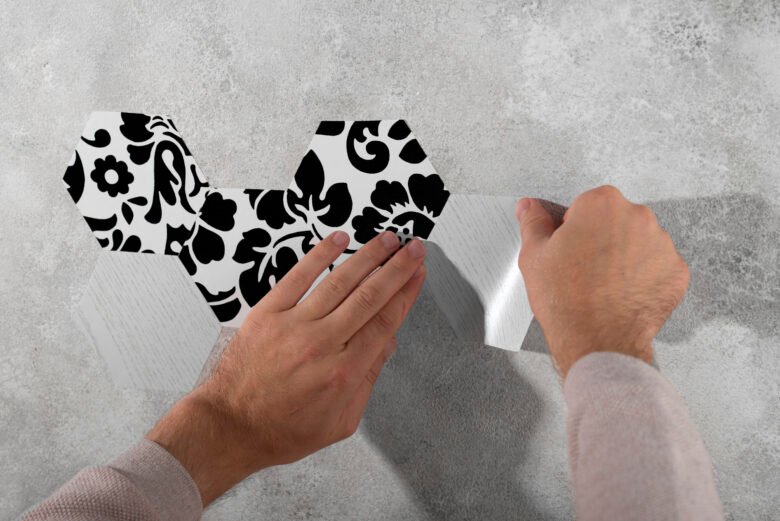
This is the most reliable method for removing peel-and-stick wallpaper without damaging walls. Heat reactivates the adhesive, making it gummy and loose rather than brittle and stuck.
Step 1: Find the seam. Start at a seam or corner. If the wallpaper overlaps, start with the top layer.
Step 2: Apply Heat Hold your hair dryer or heat gun 2–3 inches away from the surface. Move it back and forth over a 12-inch section for about 30 seconds. You are not trying to burn the paper; you are trying to warm the glue underneath. The paper should feel warm to the touch.
Step 3: The “Low and Slow” Pull Lift the corner with your fingernail or a plastic putty knife. Critical Technique: Do not pull the paper away from the wall (like you are opening a curtain). Instead, pull it flat against the wall, sliding it down or sideways.
- The 180-Degree Rule: Keep the paper as close to the wall surface as possible while pulling. If you pull outward at a 90-degree angle, you concentrate the force on the paint layer, causing tearing. If you pull flat, you shear the adhesive bond, leaving the paint intact.
Step 4: Repeat. If the paper tears, don’t panic. Reheat the remaining section and start again. Slow and steady wins this race.
Phase 3: The Residue Nightmare
Even if the vinyl comes off cleanly, you often face the dreaded adhesive residue. If you leave this on the wall, your landlord will likely repaint and charge you for “wall prep.” If you scrape it aggressively, you damage the wall.
How to remove residue:
- Mix the solution: Combine equal parts warm water and white vinegar in a spray bottle. (Alternatively, use a tablespoon of liquid fabric softener mixed with water—this breaks down the acrylic adhesive effectively).
- Spray and Wait: Saturate the residue and let it sit for 5–10 minutes. The chemical reaction will turn the sticky glue into a slippery goo.
- Wipe: Use a microfiber cloth to wipe away the residue. It should ball up and come off easily.
- Final Rinse: Wipe the wall with a clean, damp cloth to remove any vinegar or softener residue, as these can prevent new paint from adhering if the landlord decides to paint over it.
Common Mistakes to Avoid
Even experienced DIYers make these errors. Avoiding them is the difference between a smooth move-out and a frustrating repair bill.
Pulling Too Fast
- Why it happens: Impatience. You want the job done.
- The Fix: Pull at a snail’s pace. If you hear a “ripping” sound (like paper tearing), you are pulling too fast or not using enough heat. Stop immediately and reheat.
Using Metal Tools
- Why it happens: A metal scraper is usually the first tool people grab in a panic when a piece is stuck.
- The Fix: Never use metal. Metal scrapers cut into drywall paper. Once that paper is torn, you must repair it with joint compound (spackle), sand it, and prime it. Use plastic scrapers or your fingers exclusively.
Skipping the Heat Test
- Why it happens: Some people think “peel-and-stick” should just peel off cold.
- The Fix: Always test a small section with heat first. Even if the paper comes off cold, heat reduces the risk of paint failure by 90%.
Scoring the Wallpaper
- Why it happens: You read advice online meant for traditional wallpaper.
- The Fix: Do not use a scoring tool (like a Paper Tiger) on peel-and-stick. Scoring creates tiny holes that allow moisture behind the paper, but it also damages the paint and creates a textured mess that is harder to clean. Only score if the paper is so stubborn that you plan to use steam (and you have accepted you might need to repaint).
Leaving Residue for “Later”
- Why it happens: The vinyl is off, the wall looks white, and you think the residue isn’t visible.
- The Fix: Residue attracts dust and dirt. When the landlord inspects, it will look dirty and feel sticky. Remove the residue immediately while the wall is still warm from the heat removal.
Pro Tips / Expert Insights
Here are the secrets that professional painters and property managers use when dealing with temporary wallpaper.
- The Fabric Softener Trick: While vinegar works, liquid fabric softener is a powerful surfactant. It breaks the surface tension of the water, allowing it to penetrate the adhesive film more effectively than water alone. It also leaves a pleasant smell behind.
- The “Zipper” Method: If the wallpaper is extra wide, cut it vertically with a sharp razor blade (carefully, not scoring the wall) into 6-inch strips. It is much easier to manage the tension on a narrow strip than on a 2-foot-wide panel.
- Temperature Matters: Do this on a warm day if possible. If the room is cold, the adhesive becomes brittle. Turn up the heat in the apartment an hour before you start to make the glue more pliable.
Heat Gun vs. Hair Dryer
Not sure which tool to use? Here is a quick comparison to help you choose based on your specific situation.
| Feature | Hair Dryer (Standard) | Heat Gun (Low Setting) |
|---|---|---|
| Best For | Thin vinyl, small accent walls, renters on a budget | Thick wallpaper, large accent walls, stubborn adhesive |
| Heat Intensity | Low to medium (safe for all paint types) | High (risky on flat paint if held still too long) |
| Risk Level | Minimal. Hard to damage walls. | Moderate. Requires constant movement to avoid bubbling paint. |
| Speed | Slow. You will be holding it for a while. | Fast. Covers large areas quickly. |
| Cost | $20–$40 (you likely own one) | $30–$60 (specialized tool) |
Verdict: If you have flat paint or cheap apartment-grade drywall, stick to a hair dryer. If you have durable semi-gloss paint and a large area, a heat gun on low will save you hours.
Real-Life Scenario: Sarah’s Rental Kitchen Backsplash
Sarah, a renter in Austin, TX, installed a faux-tile peel-and-stick backsplash in her kitchen. Upon moving out, the landlord noted that if the wall was damaged, she would forfeit her $1,800 deposit.
The Problem: The wallpaper had been up for 18 months, directly behind the stove. The heat from cooking had baked the adhesive into a hard, plastic-like film. The wall underneath was standard builder-grade flat paint.
The Solution: Sarah did not panic. She used a heat gun on a low setting, keeping it moving constantly to avoid scorching the paint. Instead of pulling the vinyl off in one sheet, she sliced it into 4-inch strips.
As she pulled each strip flat against the wall, a thin layer of white paint came off in some spots. She stopped pulling, applied more heat, and used a plastic razor to gently separate the vinyl from the paint. For the residue, she used a fabric softener spray, letting it sit for 15 minutes.
The adhesive turned into a slimy substance that wiped away easily.
The Result: There were three small spots where the drywall paper tore. Sarah applied a thin layer of lightweight spackle, sanded it smooth, and used a damp sponge to match the texture. After a quick wipe down, the wall looked better than when she moved in. She got her full deposit back.
Frequently Asked Questions (FAQs)
Can I remove peel-and-stick wallpaper without heat?
Yes, but only if the wallpaper is brand new (installed within a few weeks) or if the adhesive is labeled “low tack.” If the wallpaper has been up for months, attempting removal without heat is the leading cause of wall damage.
Will removing peel-and-stick wallpaper pull off the paint?
It can if the paint is flat or if the wall was not properly primed before painting. However, using the “180-degree pull” technique (pulling flat against the wall) significantly reduces this risk. If paint does come off, you can patch small spots with a color-matched sample pot from a hardware store.
How do I get the sticky residue off the wall?
Mix warm water with white vinegar (1:1) or liquid fabric softener (1 tablespoon per cup of water). Spray it on, let it sit for 10 minutes to break down the adhesive, then wipe with a microfiber cloth. Avoid using harsh chemicals like Goo Gone on painted walls, as they can leave oily stains that are hard to paint over.
Is it safe to use a heat gun on drywall?
Yes, if used correctly. Keep the gun moving at all times. Do not hold it in one spot for more than a few seconds. If the paint starts to bubble or blister, you are holding it too close or staying in one place too long. Back off immediately.
What if the wallpaper is stuck to a textured wall?
Textured walls (like orange peel or knockdown) are the hardest to remove peel-and-stick from. The adhesive seeps into the valleys of the texture. In this case, you may not be able to remove it without damaging the texture. Renter Alert: If you installed wallpaper on textured walls without signing a waiver, you may be responsible for re-texturing. Go extremely slow with heat and a plastic brush.
Do I need to prime the walls after removal?
You don’t need to prime if you are moving out. However, if you successfully removed the wallpaper and cleaned the residue, your landlord will likely need to prime the wall before repainting. If you removed the wallpaper and intend to repaint to avoid charges, you must prime first, because the adhesive residue (even invisible amounts) will cause the new paint to “fish-eye” (bead up).
Conclusion
Removing peel-and-stick wallpaper without damaging walls is not about luck; it is about physics and patience. By using heat to weaken the bond, pulling at the correct angle to preserve the paint, and using safe solvents to erase the residue, you can return your rental to its original condition.