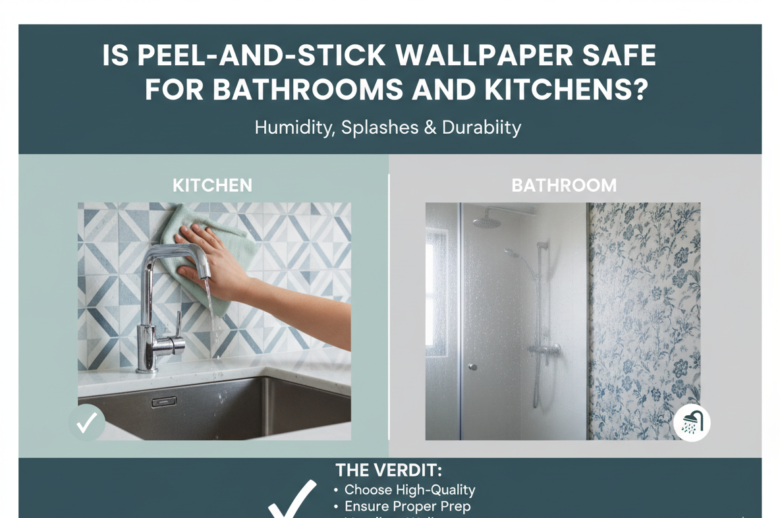
You’ve found the perfect pattern. It’s bold, it’s affordable, and best of all, no landlord drama. But before you start unrolling that peel-and-stick wallpaper in your bathroom or kitchen, one question stops you cold: Is this actually safe to use here?
It’s a fair concern. Bathrooms trap steam after every shower. Kitchens blast heat, grease, and humidity all at once. These are arguably the two most punishing rooms in any home, and most peel-and-stick products were designed with living rooms and bedrooms in mind.
The answer isn’t a flat yes or no; it depends on the product type, surface prep, and how you install it.
Why Bathrooms and Kitchens Are Risky for Peel-and-Stick Wallpaper?
Most people think the only risk is the wallpaper peeling off. That’s actually the least of your worries. The bigger concern is what happens behind the wallpaper when moisture gets trapped.
The Moisture Problem
Every hot shower fills your bathroom with steam. That steam doesn’t just float in the air; it settles onto walls. If your wallpaper has even a small unsealed edge, moisture wicks underneath and sits against the drywall. In as little as 48–72 hours of repeated exposure, mold spores can begin colonizing that hidden surface.
In kitchens, you’re dealing with a different but equally aggressive combo: grease splatter, boiling steam, and temperature swings from stovetops. These forces work together to loosen adhesive and degrade paper-based backings quickly.
The Adhesive Failure Problem
Most peel-and-stick wallpapers use pressure-sensitive acrylic adhesives. These adhesives are engineered for stable, dry environments. When the wall surface heats up like the wall beside your stove, the adhesive softens and loses its grip. You’ll notice corners lifting within weeks.
Important: Never install any peel-and-stick wallpaper directly above or beside a range or cooktop. Even “heat-resistant” vinyl products are not designed for direct radiant heat exposure over 150°F. Use a backsplash tile or heat shield in those zones instead.
Which Peel-and-Stick Wallpaper Materials Are Safe for Wet Areas?
The product category “peel-and-stick wallpaper” covers a wide range of materials, and they are not equally capable in humid spaces. Here’s how the main types stack up.
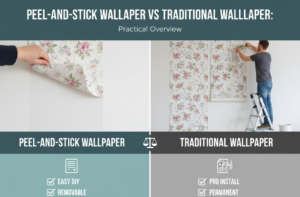
Vinyl / PVC-Based Wallpaper (Best Choice)
This is the gold standard for bathrooms and kitchens. Solid vinyl or vinyl-coated wallpaper is genuinely waterproof, not just water-resistant. It doesn’t absorb moisture, won’t swell or bubble, and can be wiped clean with a damp cloth. Look for products labeled “100% vinyl” rather than “vinyl-coated fabric,” which has a textile backing that can still absorb moisture.
- Waterproof face surface.
- Grease and stain-resistant.
- Wipeable and scrubbable.
- Longer lifespan: 3–7 years in wet areas.
Fabric-Backed Vinyl (Acceptable with Caution)
These have a vinyl face but a fabric or non-woven backing. The face handles moisture well, but the backing can wick water if edges aren’t sealed. Suitable for bathrooms with proper edge sealing, but riskier than solid vinyl.
Paper-Based Peel-and-Stick (Avoid in Wet Areas)
These are typically the cheapest options and the most commonly found in big-box stores and online marketplaces. Paper backing absorbs moisture rapidly, loses adhesion, warps, and creates the perfect dark, damp environment for mold. Not recommended for bathrooms or kitchens under any circumstances.
Peel-and-Stick Wallpaper Types
| Material Type | Waterproof? | Mold Risk | Heat Resistant? | Safe for the bathroom? | Safe for the kitchen? |
|---|---|---|---|---|---|
| 100% Solid Vinyl | Yes | Low | Moderate | Yes | With care |
| Vinyl-Coated Fabric | Face only | Medium | Moderate | Seal edges | Away from the heat |
| Non-Woven Synthetic | Partial | Medium | Low | Low humidity only | No |
| Paper-Based | No | High | None | No | No |
How to Install Peel-and-Stick Wallpaper Safely in a Bathroom or Kitchen?
Even the best vinyl product will fail if the surface isn’t prepared correctly. Follow these steps, and you’ll dramatically extend the life of your installation.
Step 1: Assess Your Wall Surface
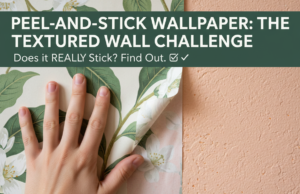
Peel-and-stick wallpaper requires a smooth, non-porous surface.
It bonds best to:
- Primed or painted drywall (eggshell or semi-gloss finish).
- Smooth plaster.
- Ceramic or porcelain tile (glossy surfaces lightly sanded first).
It will not adhere reliably to matte or flat paint, textured walls, or raw drywall. If you have flat paint, apply a coat of eggshell first and let it cure for at least 30 days before wallpapering.
Step 2: Clean Thoroughly
Wipe down the entire wall with a 50/50 mixture of white vinegar and water. Follow with isopropyl alcohol on a clean cloth. This removes grease, soap residue, and any invisible film that destroys adhesion. Let the wall dry completely for 24 hours.
Step 3: Apply in Low Humidity Conditions
Don’t install right after a shower. The wall absorbs ambient humidity, and the adhesive won’t bond properly. Install when the bathroom has been dry for several hours, ideally with a dehumidifier running for 30 minutes beforehand.
Step 4: Use a Squeegee and Work Panel by Panel
Peel only 6–8 inches of backing at a time. Press firmly with a plastic squeegee, working from the center outward. This eliminates air pockets that later trap moisture. Rushing this step is the single most common cause of bubbling.
Step 5: Seal Every Edge
This is non-negotiable in wet rooms. Apply a thin bead of clear silicone caulk along every seam, corner, and edge, especially at the floor line, around fixtures, and beside any water source. Silicone (not acrylic caulk) remains flexible and fully waterproof. Smooth it with a wet finger and let it cure for 24 hours before exposing it to moisture.
Pro Tip: Run a hair dryer on low heat along stubborn edges or corners immediately after pressing them down. Gentle heat reactivates the adhesive and improves the bond. Don’t overheat — just 10–15 seconds is enough.
5 Common Mistakes That Ruin Peel-and-Stick Wallpaper in Wet Areas
These mistakes account for the vast majority of failures, and all of them are preventable.
Skipping surface prep. People assume “clean-looking” walls are clean enough. They’re not. Invisible soap scum and grease are the top reasons adhesive fails within weeks. Always clean with isopropyl alcohol before installation.
Buying paper-based products labeled as “removable wallpaper.” Many popular budget options are paper-backed. They feel durable in the store but degrade rapidly in humidity. Always check the material spec — look specifically for “vinyl” or “PVC.”
Not sealing the edges. Even waterproof vinyl will allow moisture to creep under unsealed edges over time. Water always finds a path. The $4 tube of silicone caulk is the cheapest insurance you can buy.
Installing on freshly painted walls. New paint needs 30 days to fully cure before it can bond properly with adhesive. Installing earlier causes both the wallpaper and paint to peel simultaneously.
Ignoring ventilation. No wallpaper, vinyl, or otherwise can overcome a bathroom without proper exhaust ventilation. If your bathroom fan doesn’t clear steam within 10–15 minutes, the chronic humidity will eventually defeat even the best installation. Fix the ventilation first.
Expert Insights: What Most Articles Don’t Tell You?
The “removable” label is for living rooms, not wet rooms. When brands say removable, they mean it comes off cleanly from standard painted walls in stable conditions. Repeated steam exposure permanently changes the adhesive chemistry, making removal much harder — or causing it to take paint with it. Factor this in if you’re renting.
Ventilation is more important than the wallpaper itself. A $10 paper-roll product in a well-ventilated bathroom may outlast a $50 vinyl product in a bathroom with no exhaust fan. Manage humidity first; then choose your material.
Primer matters more than people realize. If you want maximum longevity, apply a coat of oil-based primer (not latex) before installation. It creates a hard, non-porous surface that the adhesive loves, and it protects the underlying drywall if you ever need to remove the paper.
Grout lines are the enemy. If you’re applying over tile with visible grout lines, the wallpaper will telegraph those lines through the surface within weeks — and the adhesive will fail along the recessed grout. Fill grout lines with a skim coat of joint compound, sand smooth, and prime before applying wallpaper.
Real-Life Scenario: Maria’s Rental Bathroom Transformation
Maria rented a dated apartment with salmon-pink bathroom walls she couldn’t paint without landlord approval. She bought a highly-rated peel-and-stick vinyl product in a marble pattern — but on her first try, the bottom edges started peeling within two weeks.
The problem? She’d installed it immediately after cleaning the walls with a wet sponge, and the wall was still holding ambient moisture from daily showers. She also hadn’t sealed the edges.
What she did differently on attempt two:
- Ran a dehumidifier for 4 hours before starting.
- Wiped the wall with isopropyl alcohol and waited 24 hours.
- Reinstalled slowly, pressing each panel with a squeegee.
- Caulked every edge with clear silicone.
That installation lasted 18 months through her entire lease and was removed cleanly with no wall damage. The pattern and material were the same. The prep was entirely different.
The Mold Risk: What You Actually Need to Know
Mold behind wallpaper is a real concern, but it’s also one of the most misunderstood. Mold doesn’t grow on vinyl itself. Vinyl is not an organic material and provides no nutrients for mold. The risk is to the wall surface behind the vinyl when moisture infiltrates.
If your bathroom has existing mold or a history of water intrusion, solve that problem before installing any wallpaper, peel-and-stick, or traditional. Covering mold doesn’t kill it; it accelerates it by trapping it in a dark, potentially moist environment.
Signs that moisture has gotten behind your wallpaper:
- Bubbles or soft spots that weren’t there at installation.
- A musty smell concentrated near the wall.
- Edges lifting without any mechanical cause.
- Dark spots are visible through semi-transparent vinyl.
If you see these signs, remove the affected section promptly, treat the wall with a mold-killing primer, let it dry completely, and reinstall with proper edge sealing.
Conclusion
Peel-and-stick wallpaper is absolutely safe for bathrooms and kitchens when you choose the right product and install it correctly.
Here’s what to remember:
- Material matters most: Only 100% solid vinyl belongs in wet rooms. Paper and fabric-backed options will fail.
- Surface prep is everything: Clean with isopropyl alcohol, let the wall dry fully, and apply only to smooth, fully-cured painted surfaces.
- Seal every edge: Clear silicone caulk is cheap insurance against moisture infiltration and mold.
- Ventilate your space: No wallpaper survives chronic, unmanaged humidity. Fix your exhaust fan first.
- Avoid heat zones: Keep any peel-and-stick product well away from stovetops, burners, and inside showers.
With these principles in place, you can transform your kitchen or bathroom with peel-and-stick wallpaper confidently, whether you’re a renter protecting your deposit or a homeowner looking for an easy, reversible update. The pattern you love can absolutely work. It just needs the right foundation.
Frequently Asked Questions
Can peel-and-stick wallpaper go in a shower?
No. Even the most waterproof vinyl peel-and-stick wallpaper is not designed for direct water contact inside a shower or tub surround. The constant water exposure and lack of drying time will cause adhesive failure and potential mold growth. Use waterproof tile, stone, or a solid panel system inside shower areas.
Will peel-and-stick wallpaper damage walls when removed from a bathroom?
It depends on surface prep and how long it’s been up. Vinyl applied over fully cured, primed walls generally removes cleanly. Wallpaper left up for more than 2–3 years, or applied over flat paint, is more likely to pull paint or cause surface damage. Always test a small section in an inconspicuous spot before full installation.
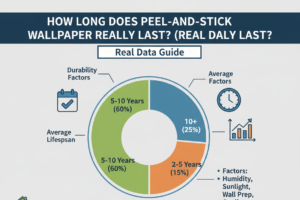
How long does peel-and-stick wallpaper last in a bathroom?
A properly installed, solid vinyl product in a well-ventilated bathroom with sealed edges typically lasts 3–5 years. Without edge sealing or in a poorly ventilated space, expect 6–18 months before visible failure. Budget paper products often fail within weeks in wet conditions.
Is peel-and-stick wallpaper safe near a gas stove?
No vinyl or paper product should be installed on walls directly adjacent to a gas burner. The combination of open flame, high heat, and grease splatter creates both an adhesion problem and a potential fire hazard. Maintain at least 18–24 inches of clearance between any peel-and-stick installation and an active burner. Use tile or a heat-rated metal backsplash in those zones.
Does peel-and-stick wallpaper work on bathroom tile?
Yes, but with preparation. Glossy tile needs to be lightly sanded with 220-grit sandpaper to give the adhesive some texture to grip. Grout lines need to be filled and smoothed, or the wallpaper will show its texture and fail along those recessed lines. Clean with isopropyl alcohol after sanding and before applying.
What’s the best peel-and-stick wallpaper for high-humidity bathrooms?
Look for 100% PVC or solid vinyl products with a waterproof adhesive backing. Brands that explicitly market their products for bathrooms and wet areas typically test for humidity resistance. Prioritize products with a thickness of at least 0.4mm — thinner materials are almost always paper or fabric-backed.