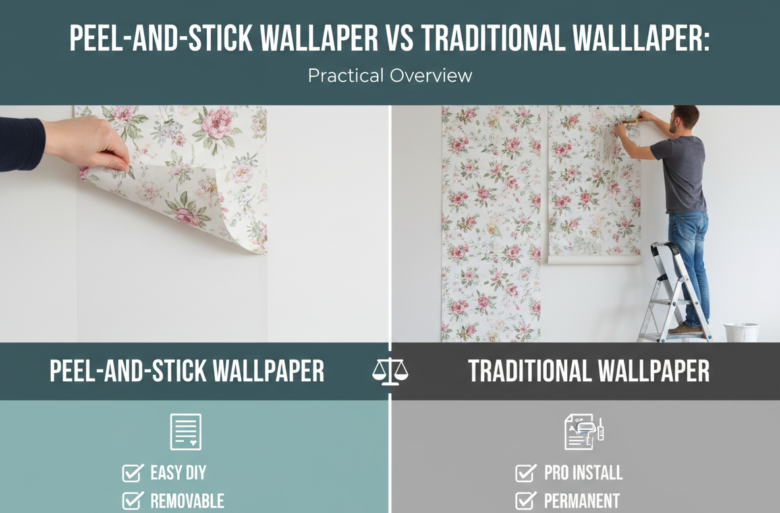
Peel-and-stick wallpaper and traditional paste-applied wallpaper both change a room’s look, but they do so in very different ways. Peel-and-stick offers fast installation and easy removal; traditional wallpaper requires more prep and skill but generally delivers longer life and greater textural depth.
This piece is for homeowners, renters, and DIYers who need a clear comparison of materials, installation steps, costs, lifespan, surface compatibility, and realistic project timing.
Side-by-side at a glance
| Peel-and-Stick (removable) | Traditional (paste-applied) | |
|---|---|---|
| Material | Vinyl-backed films or thin polymer substrates | Paper, paper-backed vinyl, woven textiles, non-wovens |
| Installation time | 1 room or an accent wall in a day | 1-3 days per room (prep, paste, drying) |
| Removal | Peels off on smooth primed walls; residue on porous surfaces | May require steaming/stripping; can damage wall paper layer |
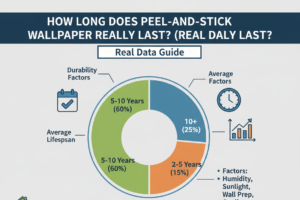
| Durability | 3-7 years typical; premium options longer | 10-20 years with proper prep and installation |
| Price per roll | $20-100 | $30-150+ |
How do the materials work, and why does that matter?
Peel-and-stick products typically consist of a printed decorative layer laminated to a vinyl or polymer backing with a pressure-sensitive adhesive (PSA). The PSA is formulated to stick immediately but release without excessive force, which enables repositioning during hang and clean removal when applied to suitable surfaces.
Thin substrates bend and show underlying texture; adhesives engineered for removability intentionally limit long-term bond strength.
Traditional wallpapers use heavier substrates, such as paper, paper-backed vinyl, woven textile, or non-woven. They are designed to be adhered with a paste that soaks slightly into the paper and into the wall’s porous surface, producing a mechanical bond. That stronger bond and thicker material are the reasons these papers stand up to scuffs and last longer.
Installation: What tools to use and common tolerance limits?
Peel-and-stick installation: tools, prep, and practical tolerances
- Tools and materials: utility knife, plastic squeegee or smoothing tool, level or plumb line, measuring tape, ladder, seam roller (optional), rubbing alcohol or mild cleaner, microfiber cloth.
- Surface prep: walls must be clean, dry, smooth, and coated with fully cured, non-textured paint. Remove grease, dust, flaking paint, and wallpaper residue. If the paint is fresh, wait about 30 days or follow the manufacturer’s guidance.
- Process basics: measure and cut strips with a 1/2-1 inch allowance at top and bottom. Peel back 6-12 inches of liner, align to a plumb line, stick and smooth from center outward. Small lifts and repositioning are possible early, but repeated re-peeling reduces the adhesive’s effectiveness.
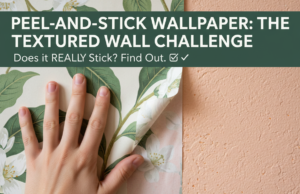
- Tolerances: peel-and-stick shows everything beneath it. Orange-peel texture, nail pops, or 1/8 inch variations in the drywall become visible. Aim for walls within 1/8 inch flatness and work in a room at 65-75°F; adhesives lose tack below about 50°F.
Traditional installation: tools, paste choices, and pattern planning
- Tools and materials: wallpaper paste (methylcellulose for light papers or stronger adhesives for vinyl-backed), pasting table or clean flat surface, brush or roller for paste, seam roller, smoothing brush, sharp utility knife, plumb line, sponge and bucket, possibly a steamer for future removal.
- Paste approach: follow manufacturer instructions—some non-wovens are “paste-the-wall” (paste on wall) while certain papers require pasting the paper and “booking” (folding pasted sides together) for a set time. Using the wrong paste can cause bubbling or seam failure.
- Pattern matching and waste: repeating designs require extra material. For repeats of 20-36 inches, expect 15-30% additional waste. Marking a plumb line and pre-laying strips helps avoid misaligned seams.
- Tolerances: heavier papers hide minor imperfections better. For textured or uneven walls, traditional papers are more forgiving but still require solid patching and priming for best results.
Removal, repair, and upkeep
Removal behavior often determines the long-term choice.
- Peel-and-stick removal on smooth, properly primed walls it typically peels off in long sheets with little residue. On porous, poorly primed, or untested surfaces, adhesive may leave residue, pull paint, or lift skim coat. If residue remains, a plastic scraper with warm soapy water or adhesive remover helps. Allow several hours to remove an accent wall; a whole room may take a morning.
- Traditional removal: non-woven papers that were pasted to the wall can sometimes lift in sheets; paper-backed adhesives often need scoring, steaming, chemical strippers, and scraping. Drywall paper can be damaged, requiring skim-coating. Expect 1-3 days for removal and repair on older installations.
- Repair strategies: small tears in peel-and-stick can be patched with a matching scrap and a small amount of adhesive. For traditional seams popping, re-gluing, and seam pressing can often fix localized issues without replacing full strips. Textured and woven papers may not accept invisible patches.
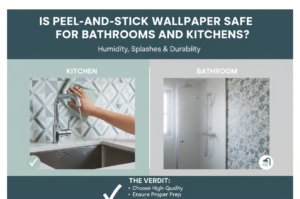
- Maintenance: wipe vinyl-backed peel-and-stick with mild soap and water. Paper-only wallpapers are less tolerant of moisture and require gentle dusting or a dry cleaning sponge.
Costs, labor, and realistic project timing
Price depends on design, material quality, and whether you hire labor.
- Material costs per standard 27 in x 16.5 ft roll: peel-and-stick $20-100, traditional $30-150+ depending on textured or designer papers.
- Labor: DIY peel-and-stick can be completed by a competent homeowner in a day for a single room or accent wall. Professional installation for traditional wallpaper often runs $1-6 per square foot in labor, depending on prep, matching, and complexity.
- Examples of time: an 8 ft x 12 ft accent wall with peel-and-stick —2-4 hours including prep. A 150 sq ft dining room with traditional paper —8-24 hours including paste, drying, and touch-ups, often spread over 1-2 days.
Decision factors: when each option makes sense
Match the material to the project and the surface. Use the following signals to decide.
- Choose peel-and-stick when you rent: need a quick update, or want to try a bold pattern temporarily. It’s also the practical choice for small rooms, accent walls, and murals that require fast turnaround.
- Choose traditional wallpaper when you want long-term durability, are installing in high-traffic areas (hallways, stairwells), or need textured or woven finishes that hide wear. Traditional is also the better choice when you expect to sell and want a finish that shows as professionally installed.
- When walls are textured: have irregularities, or paint is untested, consider skim-coating or using traditional papers with thicker backing—both approaches reduce the risk of visible defects.
Safety, measurements, and material tolerances
Safety precautions: wear eye protection when scoring or steaming; use a dust mask when scraping old wallpaper to avoid inhaling dust or potential lead-based paint chips. For homes built before 1978 where disturbance of painted surfaces is likely, follow EPA lead-safe work practices or hire certified pros.
- Measurements and allowances: measure wall height and width precisely. Allow 1/2-1 inch extra at top and bottom for trimming. Account for pattern repeat waste—high repeats (20-36 inches), add roughly 15-30% waste. For seams, aim for alignment within 1/16 inch; offsets above 1/8 inch are noticeable at normal viewing distances.
- Environmental tolerances: adhesives perform best between 65-75°F and moderate humidity. Avoid hanging peel-and-stick in very cold spaces where the adhesive becomes brittle. For traditional paste, ambient temperature and paste viscosity influence how long you should “book” strips.
Practical examples to guide choices
Scenario A short-term rental update: A renter wants a statement wall in a 12 ft x 9 ft living room and chooses a floral peel-and-stick with a 20 in repeat because the lease forbids permanent changes.
They buy two rolls at about $55 each, spend 3 hours cleaning and prepping the wall, and complete the installation in about 6 hours. Working at 72°F and smoothing each strip with a plastic squeegee kept seams tight and removal later straightforward.
Scenario B long-term homeowner upgrade: A homeowner renovating a 150 sq ft dining room prefers a woven, textured paper to hide chair rail scuffs and plans to remain in the house for years. They select traditional paste-applied wallpaper at $120 per roll. With professional hanging and prep, the total installed cost is about $900-1,200. The thicker substrate resists dents, and when a seam later needed repair, the installer re-glued the edge rather than replacing the wall.
Operational tips and realistic observations
Test first: buy an offcut or peel-and-stick sample and stick it on the intended wall for one week to verify adhesion and removability. This cheap test often answers whether the product and the surface will behave.
- Temperature and timing matter: adhesive relaxes slightly in warm rooms and tightens in cold; hanging in an unheated garage in winter commonly causes edges to lift later when the house warms up.
- Sensory detail that helps: when smoothing peel-and-stick, you’ll feel small tugging resistance as trapped air escapes; a successful seam feels uniformly taut under the squeegee. With paste-applied papers, the paste smell dissipates in a few hours as the paper seats and the seam “settles.”
- Common slip: skipping a block of time for paste “book” or pasting too thinly for heavy vinyl-backed papers leads to bubbles and seam separation.
Tools and supplies checklist
For peel-and-stick: utility knife with fresh blades, plastic squeegee, seam roller (optional), level or plumb line, measuring tape, microfiber cloth, rubbing alcohol or mild cleaner, ladder, spare roll for patches.
- For traditional: pasting table or clean flat surface, appropriate wallpaper paste, roller or paste brush, seam roller, smoothing brush, sharp utility knife and replacement blades, plumb line, sponge and bucket, ladder, and a steamer or scoring tool for future removal.
- Consumables: painter’s tape for temporary hold, caulk, and small patching compound for nail pops or holes, high-quality primer designed for wallpaper when needed.
Final practical recommendation
Pick peel-and-stick when speed, reversibility, and lower upfront cost are the priorities, and your walls are smooth and fully cured. Choose traditional wallpaper when you need longevity, a thicker texture, and the resilience to take everyday wear.
If unsure, test a scrap or consult a professional for textured walls or designer papers; a single test strip typically clarifies whether the product and substrate will perform as expected.