Tenants often inherit the tastes of their predecessors: outdated tiles, peeling walls, and worn-out floors. But this doesn’t have to be the case.
Removable self-adhesive tiles have quietly become one of the most effective ways for tenants to create truly comfortable living spaces without losing their deposit.
Why are removable tiles the best choice for tenants?
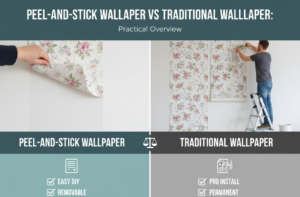
The main advantages of self-adhesive tiles are obvious: customized designs can be achieved without a long-term investment. Traditional tile installation requires grout, mortar, and professionals—all of which are undesirable in rental apartments.
Self-adhesive tiles completely solve these problems. Installation takes only an afternoon, and they are easily removed when moving out.
Besides convenience, the quality of these tiles has also been significantly improved. Modern products offer realistic 3D textures, concealed grout lines, and surface finishes that rival ceramic, stone, marble, and glass.
Whether viewed from afar or up close, they are virtually indistinguishable from the real thing.
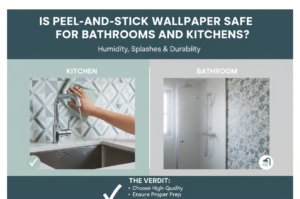
Safety is also an important factor. Many inexpensive self-adhesive products contain volatile organic compounds (VOCs), chemicals that evaporate at room temperature and negatively impact indoor air quality.
This is especially important in kitchens and bathrooms where ventilation is often limited. Choose products printed with GREENGUARD Gold-certified inks and free of vinyl, polyvinyl chloride (PVC), and phthalates.
If you have children or pets in your home, especially in the same room, it’s worth spending a little more on non-toxic products.
Types of Removable Tiles and Backsplashes
Not all self-adhesive products are of the same quality. Here’s an overview of the main categories:
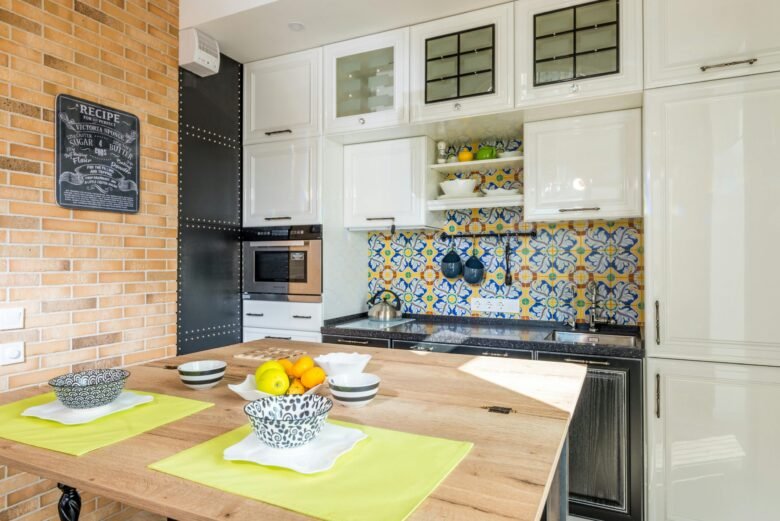
Self-adhesive tile sheets are the most common choice. They consist of interconnected mesh-reinforced tiles that mimic the look of real ceramic, stone, or glass. Their 3D texture gives them realistic visual depth, making them ideal for kitchen backsplashes. Popular designs include subway tiles, hexagons, Moroccan patterns, and marble-look textures.
Full-size self-adhesive tiles refer to tiles with adhesive on the back—not floor mats, but one-piece tiles like those sold in home improvement stores. Due to their precise proportions, they look exceptionally realistic. Installation is slightly more complex, but the results are more convincing and especially suitable for creating a clean, elegant kitchen backsplash.
Vinyl wall tiles are large, flat tiles with printed patterns, often inspired by traditional hand-painted tiles. They are the cheapest and quickest to install option, but lack the three-dimensionality and texture of 3D tile backsplashes. They are ideal for decorating walls or covering large flat surfaces.
Magnetic panels are a less common option. These panels first attach to a magnetic base on the wall, and then a decorative metal plate is attached to the base. They offer maximum flexibility, as you can change the design at any time; however, the initial cost is relatively high.
Best Tile Styles for Rental Kitchens
The right tile style depends on your kitchen’s existing color scheme and the personal style you want. Here are some of the most popular and versatile options:
Classic subway tiles are timeless, and for obvious reasons. They match almost any cabinet color and countertop material, make small spaces appear brighter, and are easy to clean. Subway tiles are available in a variety of colors, including white, beige, gray, and even matte black, making them a straightforward choice if you’re unsure which tiles to choose.
Marble-patterned tiles instantly elevate a kitchen’s elegance. White tiles with subtle gray veining create a good and luxurious visual effect and make the kitchen appear more spacious. They are especially suitable for rental apartments with darker-colored or outdated cabinetry.
Mediterranean and Moroccan-style patterns, such as blue-and-white Portuguese designs, add personality and warmth to your kitchen. They pair exceptionally well with neutral-toned cabinetry and are particularly suitable for kitchens that need a striking visual focal point. Their timeless charm makes them a true highlight in photos and will never look out of place.
Hexagonal and geometrically patterned tiles create a modern, vibrant aesthetic. They are also particularly practical: their patterns can subtly conceal wall imperfections, such as the uneven grouting often found in older rental apartments. If your walls aren’t perfectly smooth, geometric patterned tiles are more forgiving than large solid-color tiles.
“Country style” and “wood grain” tiles add a warm texture and pair perfectly with open shelves, solid wood countertops, or… Neutral tones.
Step-by-Step Installation Instructions
Even DIY beginners find laying self-adhesive tiles simple. However, thorough preparation is crucial for the final result.
Step 1: Thoroughly clean the surface. Grease, moisture, and residue can affect optimal tile adhesion. Use a degreaser, not just water, and ensure the surface is completely dry. For best results, wait 24 hours after cleaning before tiling.
Step 2: Measure and plan before removing the protective film. First, lay the tiles on the floor to better understand the layout and consider openings near electrical outlets or corners, as well as determining the starting point. Careful planning can prevent costly mistakes.
Step 3: Draw a level baseline. Even if your countertop looks level, it may not be. Use a level and pencil to draw a perfect horizontal line on the wall—this will ensure your entire kitchen backsplash remains straight during installation.
Step 4: Start from the corner and work outwards. Peel off only a few centimeters of the protective film each time. Press the tile firmly against the wall from the center outwards to remove air bubbles. You can use a plastic scraper or even an old credit card to complete this step.
Step 5: Carefully cut the tiles. For outlets, corners, and narrow spaces, use a sharp utility knife and ruler to mark lines and break the tiles. Using a paper template is a proven technique for precisely cutting outlet locations.
Step 6: Buy more tiles than you expect to need. Order 10-15% more tiles than you actually need to account for cutting errors, corrections, and inevitable breakage during trial cuts. Having extra tiles is much more cost-effective than reordering and waiting for new stock.
Important Note: Do not lay tiles on rough surfaces such as brick walls or plaster ceilings, as this will prevent them from adhering properly. If the walls have just been painted, wait at least 21 days before tiling, as the paint needs to dry completely for the adhesive to bond firmly (and be easily removed later without residue).
A Tip for Using Adhesive Film as a Backing
A particularly useful tip for renters is to apply a thin layer of adhesive film to the wall before laying self-adhesive tiles. This creates a protective layer between the tile adhesive and the painted wall.
When moving, the tiles can be easily removed from the adhesive film, and the film can be peeled off the wall, significantly reducing the risk of damaging the underlying paint or drywall.
This method is especially suitable for older rental apartments, as multiple layers of paint can make walls more susceptible to damage. The adhesive film doesn’t need to be perfectly applied; cover the surface cleanly and firmly. To avoid air bubbles, lay the film in sections, gradually.
How to Deal with Uneven Floors in Rental Apartments?
Older rental apartments often have coarse and uneven grout lines, which can be a significant challenge for solid-color floor tiles or large-area tile backsplashes. If these gaps are visible through the newly laid floor, the overall effect will be greatly diminished.
This is one of the most common reasons why tile installation doesn’t go as planned.
Consider choosing patterned tiles. Small square tiles, hexagonal tiles, and tiles with intricate geometric or Moroccan patterns are inherently easier to work with on uneven floors because the pattern can distract from the unevenness. If your rental apartment’s floors or walls are uneven, avoid using large areas of solid-colored tiles and opt for patterned tiles instead.
How to Remove Tiles Without Damaging the Walls?
The correct removal method is crucial to protecting your deposit—the secret lies in heating. Heat the tiles with a hairdryer for 30 to 60 seconds. This softens the adhesive, allowing the tiles to be removed from the wall without damaging the paint or drywall.
Starting at the top corner of the tile, heat it and carefully pry it up from the edge with a plastic scraper (never use a metal scraper to avoid damaging the wall). After prying up a corner, slowly peel the tile off at an acute angle parallel to the wall, rather than pulling it out directly. If you encounter resistance, reheat the tile and continue working slowly.
Use a soft cloth dampened with a product like Goo Gone to remove any remaining adhesive. Then wipe the wall with a damp cloth. The wall should return to its original condition.
Practical Results: What Can You Expect?
Installing a professional self-adhesive backsplash in your rental kitchen can completely transform the space. For an area of 0.5 to 0.6 square meters, it typically takes two to three hours (with assistance) or three to four hours (to complete alone).
Most projects cost between $50 and $200, depending on product quality and area, but the visual impact is remarkable: a bland, ordinary kitchen is instantly transformed into a personalized space.
High-quality self-adhesive tiles are very easy to maintain. They can be wiped clean just like real tiles, and well-adhesive tiles can last 2 years or more without peeling, yellowing, or losing adhesion. Once fully cured, small shelves can usually be easily installed on them.
The effect varies most with floor tiling. Floor tiles are more prone to wear and tear than kitchen backsplash tiles, walking, chair-leg scratches, and liquid spills, and their lifespan largely depends on the condition of the substrate. For textured or unevenly grouted floors, geometrically patterned tiles are the best choice for creating a beautiful effect.
Choosing the Right Product
When purchasing tiles, consider the following factors:
Adhesive Type: Choose low-tack or renter-friendly adhesives for easy removal from painted surfaces.
Material: Coated vinyl tiles strike the best balance between durability and ease of removal.
Ink Certification: Inks with GREENGUARD Gold certification have passed chemical emissions testing, which is especially important for indoor use.
Surface Texture: Smooth tiles accentuate wall imperfections; textured or patterned tiles are better at concealing them.
Samples: It’s advisable to order samples before the actual installation. This allows you to evaluate the color and texture in your own space, avoiding costly mistakes.
For budget-conscious buyers, brands like Art3d, RoomMates, and Smart Tiles offer high-quality standard subway tiles and hexagonal tiles for under €50. For high-quality countertops made with non-toxic materials, a standard tile backsplash costs between €100 and €200—still significantly cheaper than installing permanent tile.
Conclusion
Renting a place doesn’t mean you have to turn your kitchen into a temporary dwelling. With the right tiles, a few hours of preparation, and patience, you can personalize your kitchen and keep it looking the same.